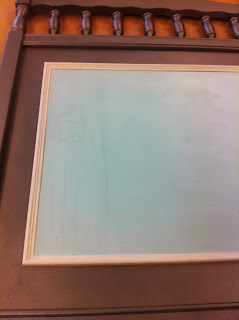
Not everyone feels comfortable painting... no problem... decoupage, stencil, wall decals, stickers... find something you love and run with it. I was so happy with how it came out, but not at first, so give yourself time. Practice first if that makes you feel more comfortable. Start with something easy- but it is do able.
Saturday, June 22, 2013
Painted Crib: Part 2... working on some details
The characters for the woodland scene started to come alive. The best advice I can give you is to not be afraid. It is just paint, if you don't like it... start over, try again, but practice makes perfect and paint is forgiving. I went slow, take your time...
Not everyone feels comfortable painting... no problem... decoupage, stencil, wall decals, stickers... find something you love and run with it. I was so happy with how it came out, but not at first, so give yourself time. Practice first if that makes you feel more comfortable. Start with something easy- but it is do able.
Not everyone feels comfortable painting... no problem... decoupage, stencil, wall decals, stickers... find something you love and run with it. I was so happy with how it came out, but not at first, so give yourself time. Practice first if that makes you feel more comfortable. Start with something easy- but it is do able.
Thursday, June 20, 2013
Reupholster Cane Barrel Chair: Part 1 Tutorial
Part of my Summer Project series... I have a lot going on... closets, organizing, decorating, and spending time with the kids.
This chair is one of a pair that broke the bank at $8.00.
We are going to say good bye to that plush camel velour...
found a spot to start with taking the piping off...
some prying and pulling and got the back and bottom off
poor guy is naked...
I just took off the velour, then primed it
a couple of coats of black... in part 2, I will put the new fabric down. Can't wait to see how they turn out.
Monday, June 17, 2013
Painted Crib: Part 1, how to transform a $20 crib into a $3600 masterpiece...
This beautiful crib can be yours with the bargain price of $3600... I love the handpainted details... so I started shopping online, craigslist that is...
 |
| this one had a lot of character for the bargain price of $20. I love the details on this one, and had a project in mind. I needed the flat, solid sides... |
 |
| I am painting this one gray with a Restoration Hardware finished look, so the gray primer is a good choice. |
 |
| My husband like the gray primer color... but I have bigger plans. |


I added moulding to frame the interior and painted it white, then started to sketch a scene...
Sunday, June 16, 2013
Father's Day Cupcakes... make them special!
Of course, Pinterest inspired... hey, any excuse to start baking and we are on it... found this pin... and we were off...
You need just a little bit of fondant, roll it out, cut in strips and create long rectangles.
 |
| It is so fun when your kiddos can express themselves in words. |
Fold the rectangles into collars...
Cut out tie shapes and use one for a template.
 |
| And there you go. All you have to do is decorate them. |
 |
| My 3 year old got into the action too. |
So colorful and fun. We would have had more ties and collars, but my kids have a sweet tooth... but you get the idea. In a Pinterest world, everything looks perfect... in my mommy world- this is perfect. Enjoy!
Saturday, June 8, 2013
Making Fairy Gardens: Upcycling broken clay pots... Pinterest Inspired
The other night, the entire family was in the car on the way to ice cream... "Stop!" I said, and my husband backed up the car. I had this "pin" in the back of my mind that was perfect for my boys... these are the pieces we found in our neighbors "treasure" by the curb. My son, J, says... "Mommy, did you hit the jackpot?" YEP!
 |
| here are the pieces we found... |
 |
| This was inspired by a few pins found on pinterest... we created this one trying to "copy" and then the boys got creative... |
I found that filling the pots with sopping wet soil was the easiest rather than filling with soil and sprinkling to get wet... but really that is the fun of it. just keep adding pieces and soil and see what you get... the steps are easy to make, take long rectangular pieces and press into the soil.
The boys like breaking up pieces for steps...
we added some sedum and plan on adding other details, but for now... this is what we have.
The best part was being creative and creating with my boys.
Subscribe to:
Posts (Atom)


